
Managing Users
Invite users, assign roles, edit accounts, ban departing employees, and manage the role hierarchy in Clarix for 503B compounding facility administration.
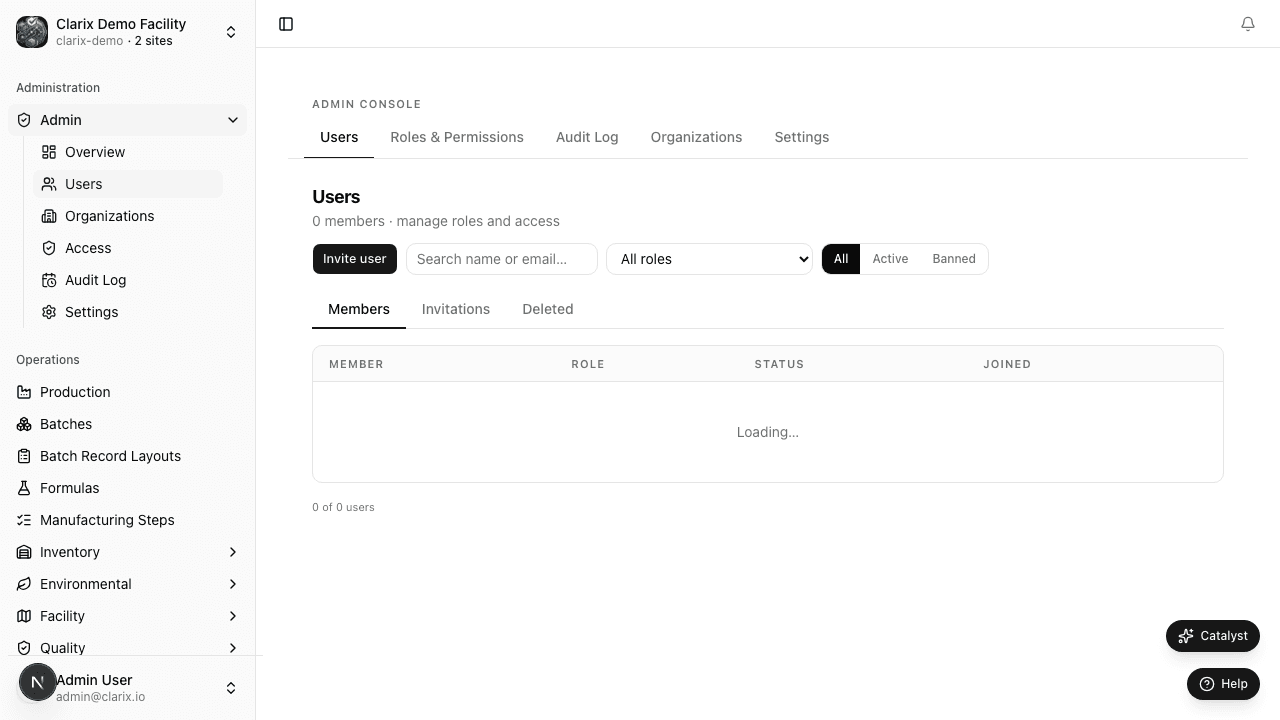
The Users page at /admin/users is where administrators manage every person who has access to Clarix at your facility. Here you can invite new team members, adjust role assignments as job functions change, view the last login date for every account, and immediately revoke access when personnel leave. Keeping this page accurate and up to date is one of the most important administrative responsibilities in a 503B GxP system.
Role required: Administrator or Super Administrator. All user management actions are logged in the audit trail with the administrator's identity and timestamp.
The user table
The main users table shows every account in your organization with the following columns:
- Name — The user's display name
- Email — The account's login email address
- Role — The user's current assigned role (see role list below)
- Organization — Which organization(s) this user belongs to (relevant in multi-site setups)
- Status — Active, Invited (pending), or Banned
- Last login — Timestamp of the most recent successful login
The table supports search by name or email, and filtering by role and status.
Inviting a new user
To add a new team member to your Clarix organization:
- Navigate to Admin → Users.
- Click Invite User in the top-right corner.
- Enter the new user's email address.
- Select their role from the dropdown (see role descriptions below).
- If your organization has multiple sites, select the organization they belong to.
- Click Send Invitation.
Clarix sends the user an email with a link to complete account setup (set a password and configure their profile). The invitation link is valid for 72 hours. If it expires, you can resend it from the user's row in the table by clicking Resend Invitation.
While the invitation is pending, the user's status shows as Invited and they cannot log in yet.
Editing a user
To change a user's name, role, or organization membership:
- Click on the user's row in the table, or click the Edit button (pencil icon) at the end of their row.
- In the edit panel, update the fields you need to change.
- Click Save Changes.
Role changes take effect immediately — the user's permissions update on their next page load or API call, without requiring a logout.
User profile fields
In addition to name, email, and role, each user record supports extended contact and organizational fields:
| Field | Description |
|---|---|
| Phone | Direct contact phone number for the user |
| Supervisor | Reference to the user's manager or supervisor within your organization hierarchy |
| Honorific title | Prefix such as Mr, Ms, or Dr — used on printed reports and labels where configured |
| Suffix | Name suffix such as Jr or Sr |
| Address | Contact address fields: address line 1, address line 2, city, state, and postal code |
These fields are optional. Populate them for personnel directories, training records, and audit trail display. The supervisor reference establishes your org chart in Clarix without affecting role-based permissions — a user's access is determined solely by their assigned role.
Note: Changing a user's role is a significant action in a GxP system. If you are demoting a QA Officer to a lower-privilege role (for example, due to a job function change), review any open deviations or CAPAs assigned to that person and reassign them before changing the role. The change is logged in the audit trail with the previous role and new role recorded.
Banning a user
Banning prevents a user from logging in immediately without deleting their account or their activity history. Use this action when an employee leaves the facility or when access needs to be suspended pending an investigation.
- Click the Ban User button on the user's row (or from their edit panel).
- Confirm the action in the confirmation dialog.
- The user's status changes to Banned and any active sessions are terminated immediately.
Banned users remain visible in the user table and their historical activity (batch steps, deviations, audit entries) is preserved and fully traceable. You can unban a user at any time by clicking Unban User on their row.
Note: Do not delete a user account if you want to preserve audit trail traceability. Deletion removes the user record, which can make audit entries display as "[Deleted User]" instead of the person's name. Ban instead of delete for departing employees, unless your data retention policy specifically requires deletion.
Deleting a user
To permanently remove a user account:
- Open the user's edit panel.
- Click Delete User at the bottom of the panel.
- Enter your own password to confirm the destructive action.
- Click Confirm Delete.
This action is irreversible. Historical audit entries for the deleted user will display as "[Deleted User]."
The role hierarchy
Clarix uses a structured role hierarchy to enforce separation of duties across 503B operations. Roles are cumulative from bottom to top — a higher role includes the permissions of all lower roles unless explicitly restricted.
| Role | Primary function |
|---|---|
| Viewer | Read-only access to batches, formulas, and inventory |
| Technician | Execute batch steps, receive inventory lots |
| Senior Technician | Technician + can create batches, request amendments |
| Visual Inspector | Execute visual inspection steps on assigned batches via iPad or web |
| VI Trainer | Train and qualify visual inspectors; manage VI qualification records |
| VI Trainer Supervisor | Supervise the visual inspection training program and VI trainers |
| Technician Trainer | Train and qualify compounding technicians on SOPs and batch execution |
| Technician Trainer Supervisor | Supervise the compounding technician training program and technician trainers |
| Lab Technician | Lab sample entry and result recording |
| EM Technician | Environmental monitoring data entry |
| QA Technician | QA review queue access, view deviations and reports |
| QA Officer | Create and manage deviations, CAPAs, and OOS records |
| QA Manager | Close deviations and CAPAs, manage EM program, approve SOPs |
| Inventory Manager | Full inventory management including lot disposition |
| Equipment Manager | Asset management, calibration records, PM scheduling |
| Training Coordinator | Training plan management, qualification records |
| Human Resources | Personnel administration, user onboarding support, org hierarchy maintenance |
| IT Analyst | System support, integration configuration, and technical troubleshooting |
| Pharmacist | Formula authoring, batch review, label verification |
| PIC | Pharmacist-in-Charge — full operational authority, batch release |
| Administrator | User management, system configuration, audit access |
| Super Administrator | Cross-organization admin, system-wide settings |
Custom organization roles
In addition to the standard role hierarchy, administrators can create custom organization roles — role names specific to your facility's job titles that map to one of the standard system roles. For example, you might create a custom role called "Senior Compounder III" that maps to the Senior Technician system role. Custom roles appear in the role assignment dropdown for your organization and are visible to users in their profile, but the underlying permissions are determined by the mapped system role.
To create a custom role, navigate to Admin → Users and click Manage Roles in the page header.
Permission preview
When assigning a role, click the Preview Permissions link next to the role dropdown to see a full list of what actions that role can perform. This is especially useful when onboarding a new team member and you are deciding between two adjacent roles.
Best practices
Principle of least privilege — Assign the lowest role that allows each person to perform their job function. Do not assign PIC or QA Manager roles to technicians simply for convenience.
Separation of duties — FDA and USP <797> require that the person who executes a batch cannot also be the person who releases it. Enforce this by ensuring compounders hold Technician or Senior Technician roles and release authority is restricted to PIC.
Regular access review — At least quarterly, review the user table and confirm that every Active account belongs to a current employee with a legitimate need for access. Document your review in your quality system.
Related pages
Administration Overview
Overview of the Clarix administration section — user management, multi-organization setup, access control, and admin settings for 503B facility administrators.
Organizations
Set up and manage multiple organizations (sites) in Clarix for 503B facilities operating across multiple locations — with per-org data isolation and user membership control.