
EM Locations
Registering environmental monitoring sample points — room linkage, location types, and USP 797 coverage
EM Locations
Overview
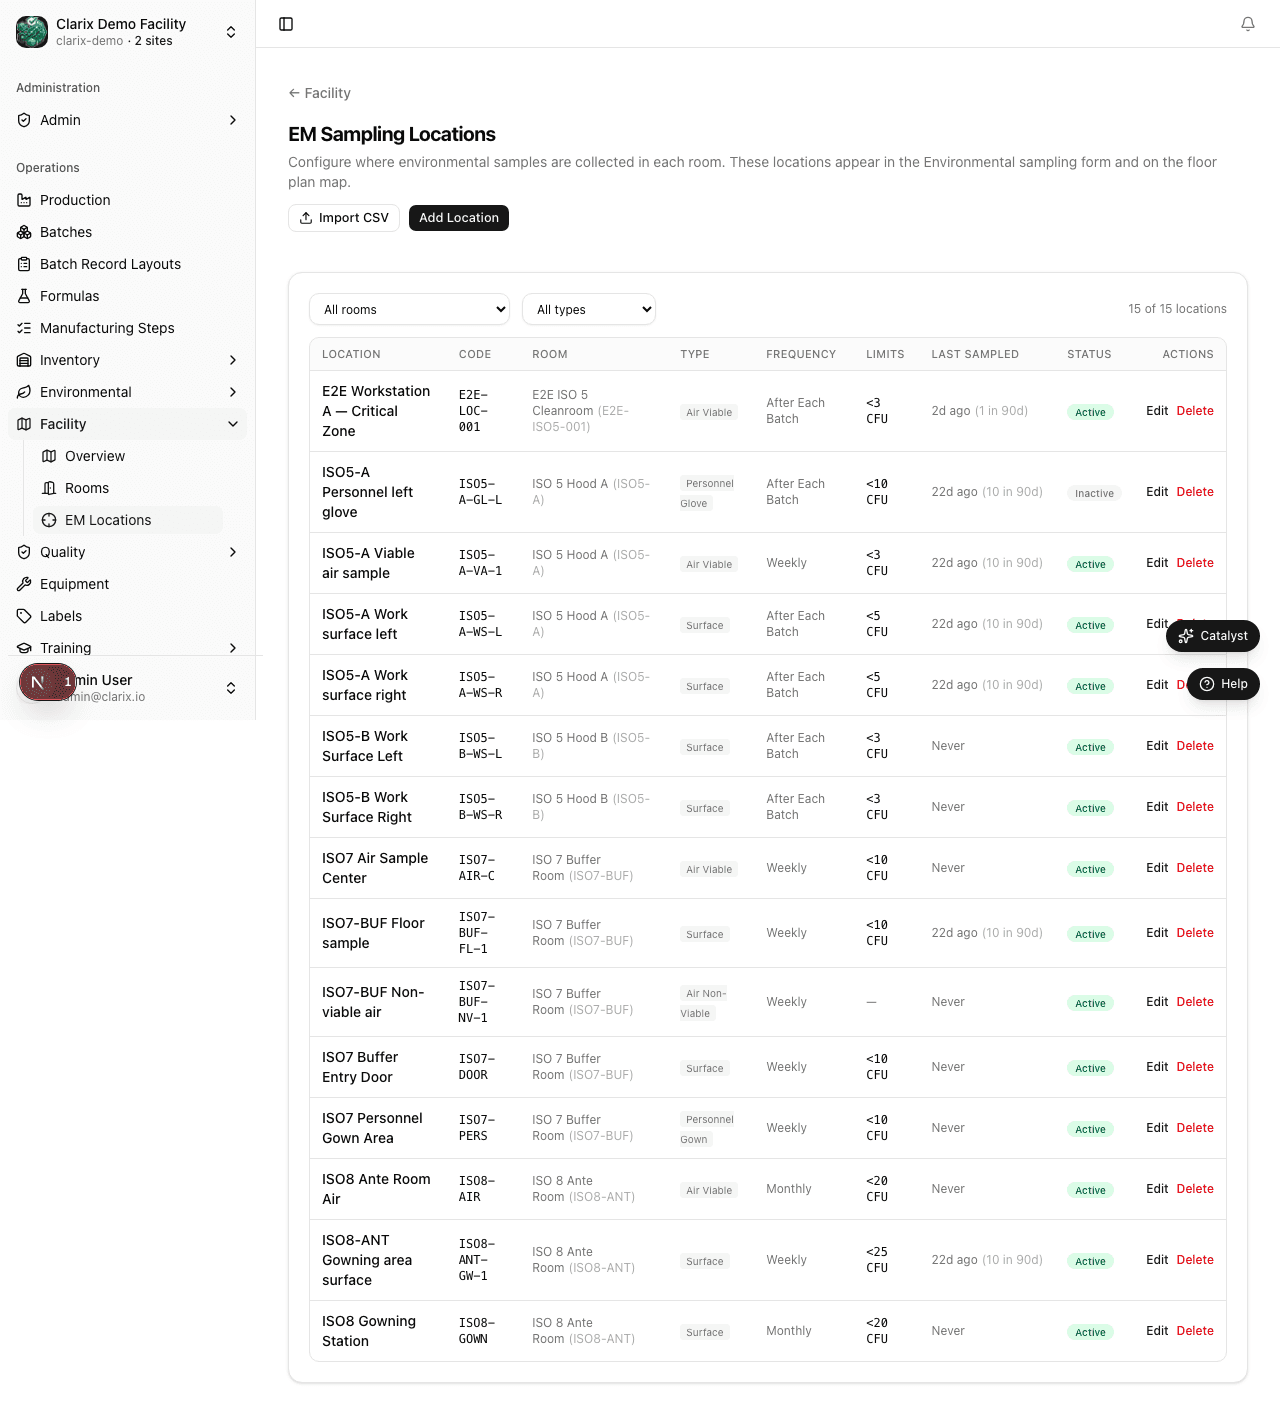
EM Locations are the individual sample points within your facility that are monitored as part of your Environmental Monitoring (EM) program. Each location represents a discrete physical position — such as a settle plate spot on the floor of an ISO 7 buffer room, or a T/H sensor mounted near a cleanroom HVAC return — and is mapped to a parent room record for classification and traceability.
Supported location types include settle plates, contact plates, air samples, T/H sensors, and particle counters, covering the full spectrum of USP 797 monitoring requirements.
EM Location Fields
| Field | Description |
|---|---|
| Name | Human-readable label for the sample point (e.g., "Buffer Room North — Settle Plate 1") |
| Code | Short stable identifier used in sampling sessions and trend reports (e.g., BR-N-SP1) |
| Room | The linked room record — provides inherited ISO classification and physical grouping |
| Location Type | Category of monitoring: Settle Plate, Contact Plate, Air Sample, T/H Sensor, or Particle Counter |
| ISO Class | ISO classification for this point — defaults to the parent room's class; can be overridden if the point sits at a different classification boundary |
| Active | Whether the location is available for new sampling sessions |
How to Add an EM Location
- Go to Settings → Facility → EM Locations.
- Click Add EM Location.
- Enter a Name and unique Code for the sample point.
- Select the parent Room from the dropdown (rooms must be created first — see Rooms).
- Choose the Location Type that matches the monitoring method.
- Confirm or override the ISO Class if this point requires a different classification than its parent room.
- Leave Active toggled on, then click Save.
Role required: Settings permission is required to create or modify EM locations.
Location Types Reference
| Type | What It Captures | USP 797 Frequency Guidance |
|---|---|---|
| Settle Plate | Viable airborne particles (colony-forming units) deposited by gravity over an exposure period | At minimum every 6 months for ISO 5; monthly or per-session for ISO 7/8 |
| Contact Plate | Surface viable contamination from floors, walls, equipment, and personnel gloves | Per compounding session or at defined intervals per SOP |
| Air Sample | Active air sampling using an impaction or centrifugal sampler | At minimum every 6 months; frequency increases with risk category |
| T/H Sensor | Continuous or periodic temperature and relative humidity readings | Continuous monitoring preferred; at minimum before and after each session |
| Particle Counter | Non-viable airborne particle counts (0.5 µm and 5 µm channels) | During operational and at-rest certification per ISO 14644-1 |
Specific action and alert limits, and exact frequencies, should reflect your facility's written EM SOP and USP 797 compliance posture. Clarix enforces the limits you configure, not a built-in default.
Linking to Environmental Sampling
When a sampling session is created in the Environmental module:
- The operator opens a new sampling session and selects the relevant EM locations as sample points.
- Each location appears as a row in the session form, where the result (CFU count, particle count, or T/H reading) is recorded.
- After the session is submitted, results are associated with the location record and contribute to trend data.
For T/H sensors, readings may be ingested automatically if sensors are connected via the Clarix sensor integration (see Settings → Integrations).
EM Trend Reporting
Clarix aggregates all sampling results by location and renders trend charts available in the Environmental → Trend Reports view:
- Time-series charts per location show CFU counts or readings over configurable date ranges.
- Locations with excursions (results above action or alert limits) are flagged with an indicator in the EM Locations list and in trend charts.
- Trend data follows the location's Code — changing the code after production use is not recommended.
Deactivating a Location
Note: Retiring a location — if a sample point is physically moved to a new position in the room, deactivate the old location (toggle Active to Off) and create a new location record for the new position. This preserves the historical trend data under the original location code. Do not rename the old location to the new position, as this would corrupt the historical record.
Once deactivated, the location no longer appears in new sampling session dropdowns. All historical sampling records that reference the location retain the link and remain accessible in trend reports.
Related Pages
Rooms
Managing the room register — ISO classification, usage tracking, and batch/EM linkage
Reports Overview
Pre-built analytics reports for FDA inspections and internal performance review in Clarix — covering batch production, quality, environmental monitoring, training, inventory, and audit readiness.