
Creating a Formula
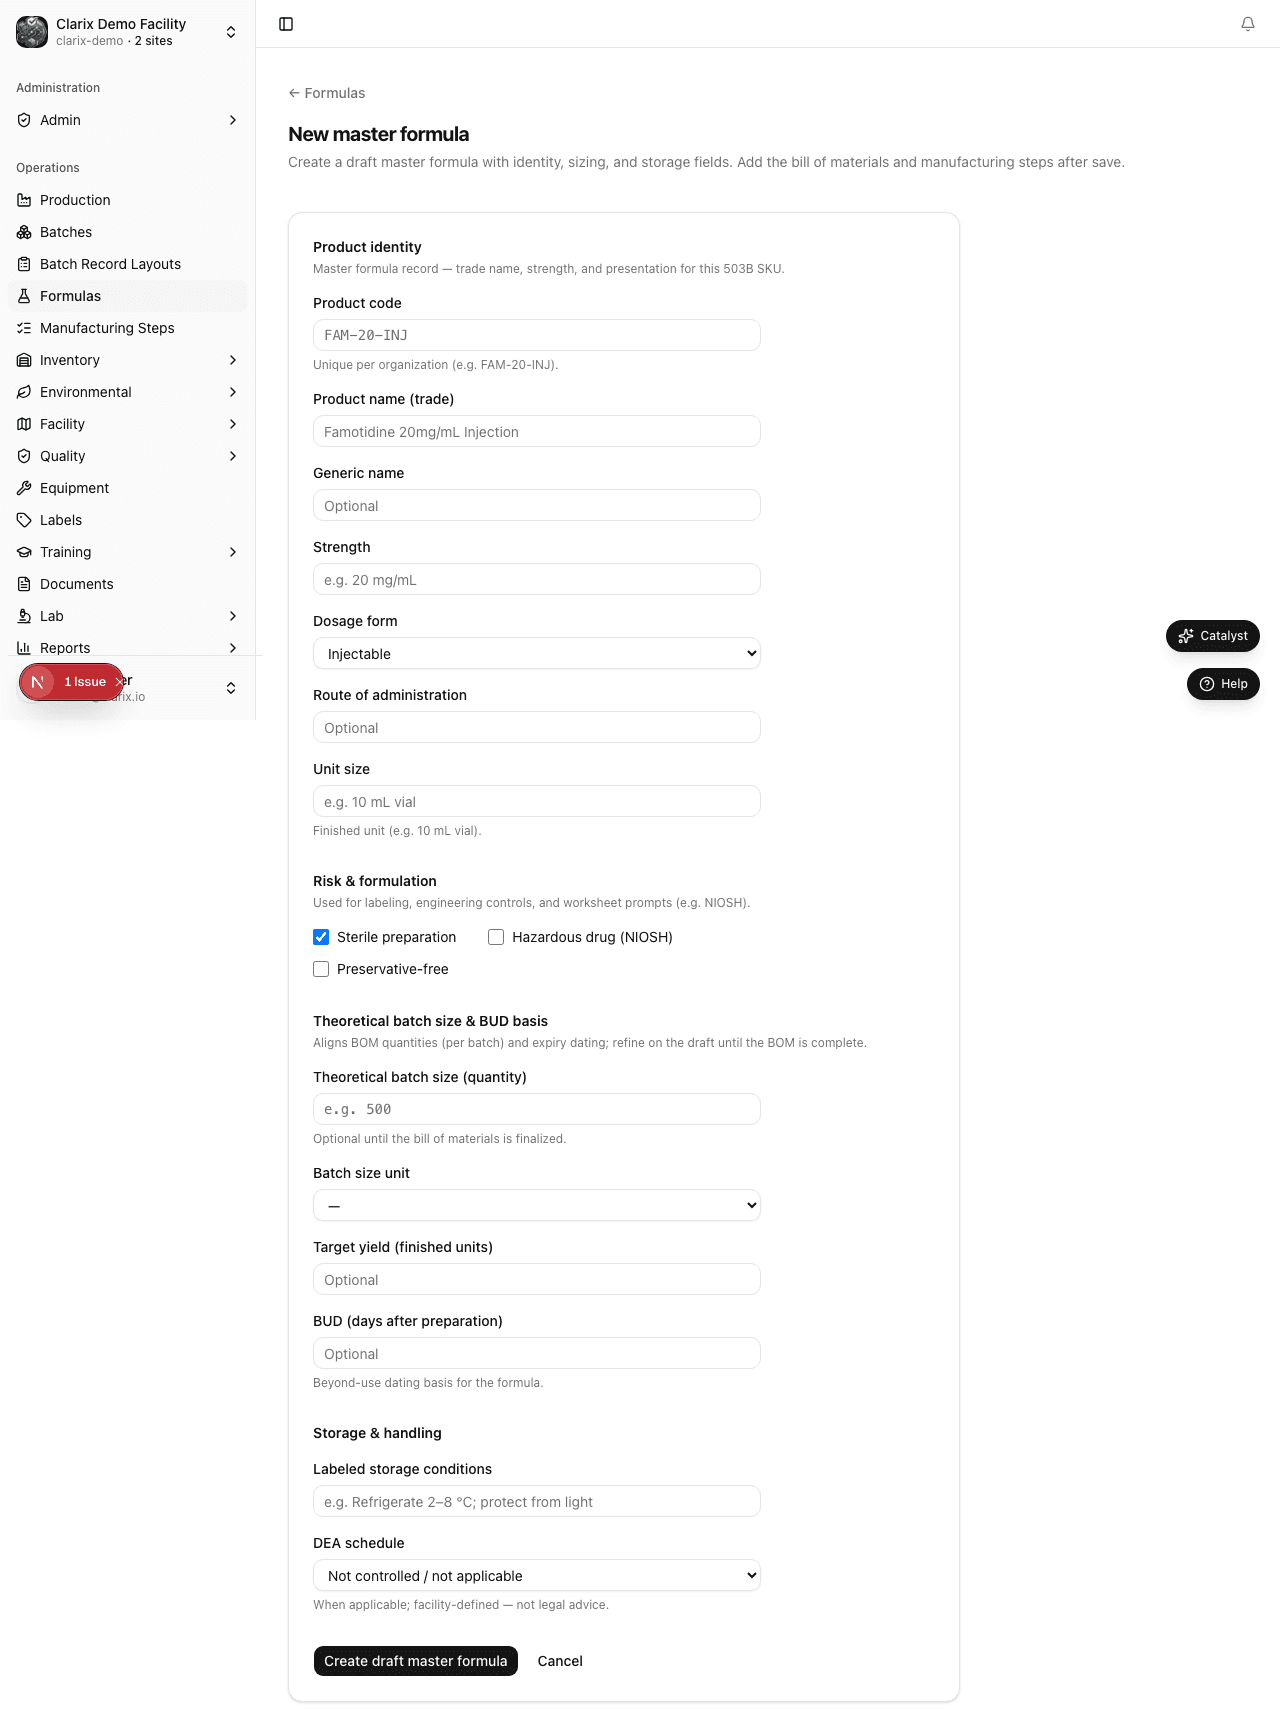
Step-by-step guide to creating a new Master Formula Record (MFR) using the five-step New Formula wizard in Clarix.
Creating a Master Formula Record (MFR) in Clarix uses a structured five-step wizard that captures all the core attributes of a compound before you begin adding ingredients and manufacturing steps. The wizard keeps you on track and prevents you from saving an incomplete formula shell.
Role required: Compounder, PIC, or QA Manager role is required to create formulas.
Before you begin
Gather the following information before starting the wizard:
- Product name and any internal product code your facility uses
- Strength (e.g., 10 mg/mL) and dosage form
- Intended batch size and unit
- BUD category and day count (consult your pharmacy's SOPs and USP ⟨797⟩/⟨795⟩)
- Storage requirements for the finished product
- Risk level designation per your facility's risk assessment
Opening the wizard
- In the left sidebar, click Formulas.
- Click the New Formula button in the top-right corner of the formula catalog page.
- The five-step wizard opens as a full-page form.
Step 1 — Product identity
This step establishes the core identity of the compound.
| Field | Description |
|---|---|
| Product name | Full descriptive name, e.g., "Ascorbic Acid 500 mg/mL 30 mL IV" |
| Product code | Your facility's internal code (optional but recommended for barcode matching), e.g., "VITC-489" |
| Strength | Concentration or potency, e.g., "500 mg/mL" or "200 mg/5 mL" |
| Dosage form | Select from the dropdown: Injectable Solution, Injectable Suspension, Ophthalmic, Otic, Oral Solution, Oral Suspension, Topical Cream, Topical Gel, Suppository, Capsule, Other |
Click Next when complete. All fields except Product code are required.
Step 2 — Batch size and unit
Specify how large a single production run of this formula will be.
| Field | Description |
|---|---|
| Batch size | A positive number representing the total yield (e.g., 240 vials for VITC-489) |
| Unit | Select the unit: mL, L, g, kg, units, vials, capsules, patches |
The batch size entered here is stored as the batchSize variable available in calculation steps. When a batch is created from this formula, the actual yield may vary, but calculation steps will always reference this target size.
Click Next when complete.
Step 3 — Beyond-Use Date (BUD)
The BUD tells dispensers how long the finished product can be used after compounding. Clarix presents a category selector that enforces the correct framework depending on product type.
Sterile products (USP ⟨797⟩):
| Category | Maximum BUD | Typical use |
|---|---|---|
| Category 1 | 1 day (24 hours) at room temp, or 4 days refrigerated | Immediate-use or low-risk preparations without sterility testing |
| Category 2 | Up to 45 days at room temp or 60 days refrigerated | Preparations with extended dating supported by facility-specific testing |
| Category 3 | Based on stability study data — enter study-supported days | Products with container/closure and stability data |
Non-sterile products (USP ⟨795⟩):
| Type | Guidance |
|---|---|
| Non-aqueous preparations | Up to 180 days (enter the specific day count) |
| Water-containing oral | Up to 14 days refrigerated |
| Water-containing topical/mucosal | Up to 30 days |
| Other | Enter the facility SOP–determined day count |
To set the BUD:
- Select whether the product is Sterile or Non-sterile.
- Select the applicable BUD category from the dropdown.
- Enter the number of days in the BUD field. For Category 1 sterile products, the field auto-fills to 1 and is locked.
- Optionally enter a BUD note (e.g., "per stability study SS-2024-003") for auditing purposes.
Click Next when complete.
Step 4 — Storage conditions
Specify how the finished product must be stored to maintain potency and sterility.
Primary storage temperature — select one:
- Room temperature (15–25 °C / 59–77 °F)
- Refrigerate (2–8 °C / 36–46 °F)
- Freeze (−25 to −10 °C / −13 to 14 °F)
- Deep freeze (below −40 °C)
Additional conditions — check all that apply:
- Protect from light — product must be stored in amber or opaque containers
- Protect from moisture — desiccant required
- Do not shake — applicable to suspensions
These conditions are printed on the batch record and are available as reference data during label generation.
Click Next when complete.
Step 5 — Risk level
Assign the risk level for this formula. Risk level affects which environmental monitoring (EM) data is required to release batches and which cleanroom zones must be used.
| Level | Typical use |
|---|---|
| Low | Non-sterile products, multi-dose oral preparations |
| Medium | Sterile preparations compounded without direct contact with the patient |
| High | Sterile preparations for high-risk routes or patients with compromised immunity |
Select the appropriate level and add any risk-level justification notes in the Notes field.
Click Save draft to complete the wizard.
After saving the draft
Once the wizard is complete, Clarix creates the formula in Draft status and assigns it a formula number (e.g., MF-2026-0001). You are taken directly to the formula detail page where you can:
- Add BOM lines on the Bill of Materials tab — add each ingredient with its target quantity and acceptable range.
- Author steps on the Steps tab — define the numbered manufacturing procedure.
- Submit for review once the formula is complete and ready for pharmacist approval.
Tip: You can save a draft formula and return to it later. Drafts remain editable indefinitely until submitted for review.