
QC Samples
Create and track quality control sample submissions from collection through testing, result entry, and OOS investigation.
QC samples are the laboratory test records that document whether a compounded sterile preparation meets its finished product specifications before release. Each sample record in Clarix captures the complete life cycle of a test: what was sampled, when, by whom, what tests were requested, who performed the testing, and what the result was. For 503B facilities, maintaining complete, current QC sample records for every released batch is a non-negotiable regulatory requirement.
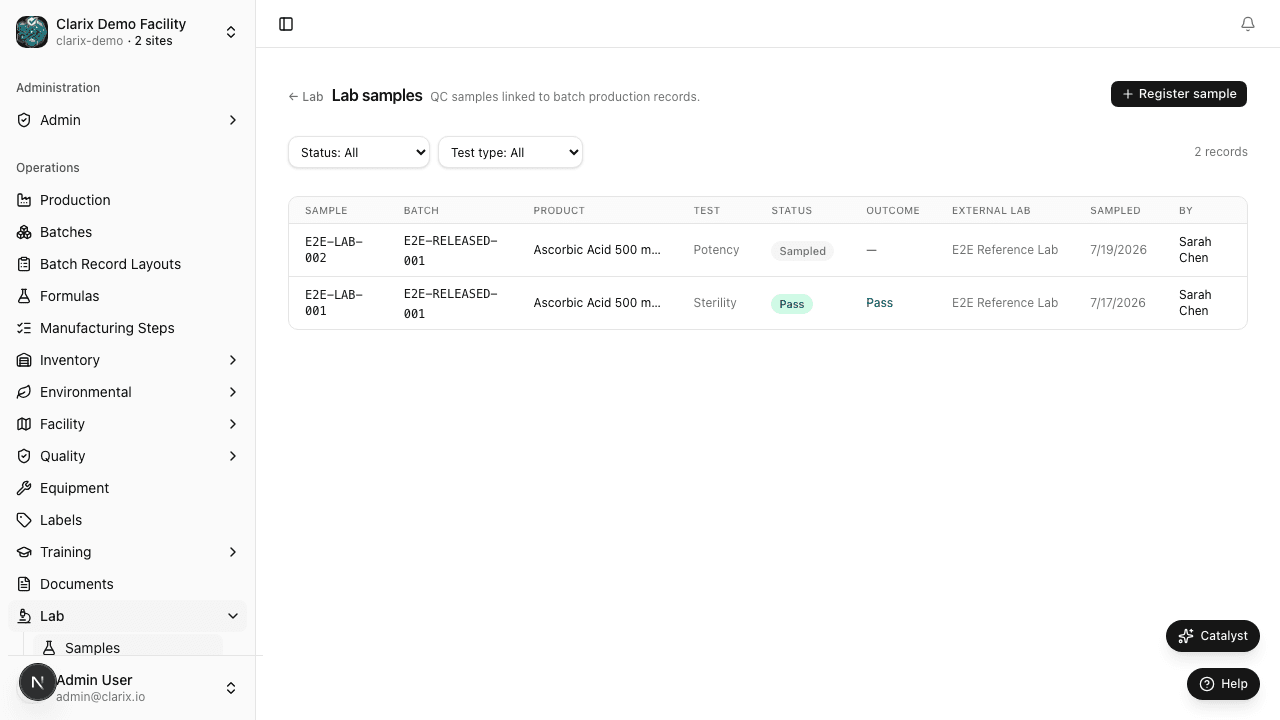
Navigate to Lab → Samples to access the samples register.
Sample types
Clarix supports the following QC sample types, covering the full range of testing performed in a 503B sterile compounding quality control program:
- Identity — confirms that the API (active pharmaceutical ingredient) in the finished preparation is the correct compound (typically by HPLC or IR spectroscopy)
- Potency — confirms the concentration of the API in the finished preparation is within specification (typically by HPLC or UV/vis assay)
- Sterility — direct inoculation or membrane filtration test confirming the absence of viable microorganisms in a sterile preparation
- Endotoxin — LAL (limulus amebocyte lysate) or rFC test for bacterial endotoxins, critical for IV preparations
- Particulates — sub-visible particle testing per USP 788 (light obscuration) confirming absence of visible and sub-visible particulate matter
- Stability — samples pulled from a finished batch and stored under defined conditions, then tested at defined intervals to validate or verify the beyond-use date (BUD)
- Other — any additional test type (pH, osmolality, color/appearance, container closure integrity, etc.)
Creating a new QC sample
- Navigate to Lab → Samples and click New Sample.
- Select the Sample Type from the dropdown (Identity, Potency, Sterility, etc.).
- Select the Linked Batch — the batch record this sample is drawn from. Selecting a batch pre-fills the product name, lot number, formula, and manufacturing date. For environmental or other non-batch samples, this field can be left empty.
- Enter the Collection Date — the date and time the sample was physically drawn from the batch or environment.
- Select the Test Method — the analytical procedure used to test the sample (e.g., "USP 788 — Sub-visible Particulates," "HPLC-UV Potency per STP-HPLC-001," "USP 71 — Sterility"). Test methods should correspond to your approved Standard Testing Procedures.
- Select the Assigned Lab — either your internal QC lab or the name of the external contract laboratory performing the testing. External labs are configured in Settings.
- Enter the Expected Result Date — the date by which results are expected from the testing lab. This date is used to generate the "due for results" alerts on the Lab Hub dashboard.
- Add any Collection Notes — for example, the sample volume pulled, the container type, storage conditions, or any deviations from the standard sampling procedure.
- Click Save Sample. The sample enters Collected status.
Sample states
Each QC sample progresses through a defined lifecycle:
- Collected — the sample has been logged and the collection recorded, but testing has not yet begun
- In Testing — the sample has been received by the testing lab and testing is underway. Click Mark In Testing to transition the sample to this state and record the date testing began.
- Pass — testing is complete and the result meets all specifications. The sample is closed with a Pass result.
- Fail — testing is complete and the result does not meet specifications (below or above acceptable limits but not necessarily OOS). A Fail result triggers a QA review.
- OOS (Out of Specification) — the result falls outside the established specification limits. OOS results require a formal investigation per 21 CFR 211.192 before any batch release decision can be made.
Entering a test result
When results are received from the testing lab:
- Open the sample record and click Enter Result.
- Enter the Result Value — the numerical or descriptive result from the test (e.g., "102.3% label claim," "No growth observed," "3 particles/mL >10 µm").
- Enter the Result Date — when the result was received.
- Select the Final Status: Pass, Fail, or OOS.
- Upload the Lab Report — click Choose file to upload the signed certificate of analysis or test report from the testing laboratory directly (PDF, PNG, JPEG; up to 10 MB). The file is stored in Clarix's secure blob storage and linked to this sample record.
- Enter your Facility PIN to sign the result entry.
- Click Save Result.
Batch release dependency: Until a test result is entered and the status is set to Pass, the linked batch is blocked from PIC release. Pending or failing samples prevent final release. See QA and PIC Release for details.
OOS investigation
When a sample result is recorded as OOS, Clarix automatically creates an OOS investigation record linked to the sample. The investigation follows 21 CFR 211.192 guidance:
- Phase I — Laboratory Investigation: First rule out laboratory error, instrument malfunction, calculation error, or sampling error as the cause of the anomalous result. Document all checks performed.
- Phase II — Full Investigation: If the OOS result is confirmed genuine, expand the investigation to assess whether the result reflects a manufacturing problem. Evaluate the batch record for any deviations, weigh the impact on product quality, and assess product disposition.
- Product Disposition: Based on the investigation findings, make a formal disposition decision: reject the batch, retest (if scientifically justified per FDA guidance), or escalate to recall procedures if product has been distributed.
All investigation documentation, including the outcome, product disposition, and the QA reviewer's signature, is stored permanently in Clarix.
Role required: Lab Technicians and QA staff can create samples and enter results. QA Managers and Admins can manage OOS investigations and sign off on final dispositions.
Related pages
Lab Overview
Manage QC sample submissions, track test results, and link laboratory findings to batch records and quality investigations.
Stability Testing
Create and manage stability protocols for compounded sterile preparations under 21 CFR 211.166 and ICH Q1A(R2), with automated sample scheduling, ICH time points, and BUD support.