
Inventory Import
How to bulk-import inventory items and lots into Clarix using CSV files, including template download, column mapping, and error resolution.
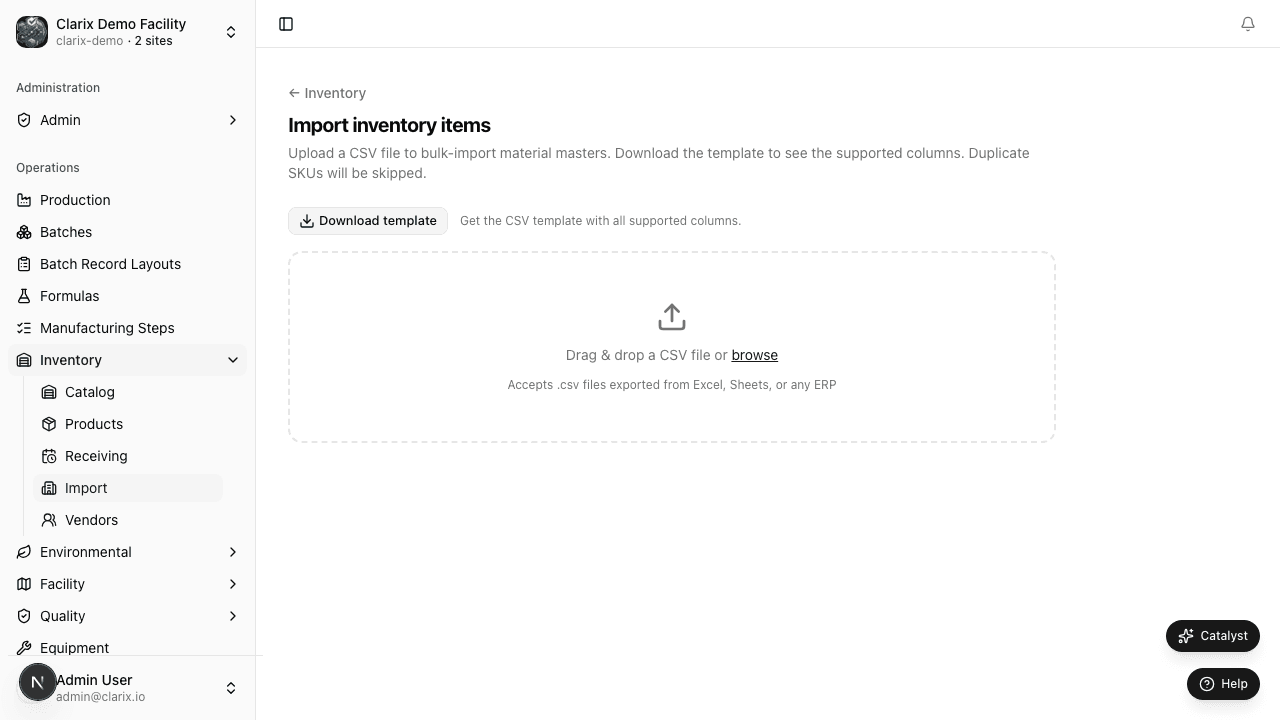
Clarix provides a bulk import tool for adding inventory items (material masters) and lots in volume from CSV files. This is especially useful during initial system setup, when migrating from a spreadsheet-based inventory system, or when receiving a large shipment with many distinct lots.
Role required: QA Officer or Admin role is required to run inventory imports.
Import paths available
There are two distinct import workflows in the Inventory module:
| Import type | Location | What it creates |
|---|---|---|
| Items import | Inventory → Import → Items | New inventory item (material master) records |
| Lots import | Receiving → Import (/inventory/receiving/import) | New lot records on existing inventory items |
Both imports use the same general workflow: download a template, fill it in, upload the file, review the validation preview, and confirm.
Items import (bulk material master creation)
Use this import to create multiple new inventory items at once. This does not create any lots — it only creates the item records. Receive lots separately after the items exist in the system.
Step-by-step: importing items
- In the sidebar, click Inventory.
- Click the Import button in the page header.
- Click the Items tab.
- Click Download template to download the CSV template.
- Fill in the template columns (see below).
- Click Upload CSV and select your file.
- Review the import preview — each row shows parsed values and any errors.
- Resolve errors or deselect invalid rows.
- Click Confirm import.
Items CSV template columns
| Column | Required | Description |
|---|---|---|
item_name | Yes | Full descriptive name of the material (e.g., "Famotidine USP") |
category | Yes | API, Excipient, Diluent, Packaging, Labeling, CleaningAgent, Other |
default_unit | Yes | g, kg, mg, mL, L, units, each |
ndc | No | 11-digit NDC in XXXXX-XXXX-XX format |
cas_number | No | CAS registry number |
physical_form | No | Physical state: liquid, powder, oil, device, or other |
strength | No | Free-text strength descriptor (e.g., "1N", "200 mg/mL") |
speed_code | No | Short mnemonic code (e.g., "NACL", "SWFI") |
generic_name | No | INN or generic drug name |
unit_cost | No | Cost per default unit (numeric decimal) |
manufacturer_name | No | Primary manufacturer name (free text; separate from vendor/wholesaler) |
manufacturer | No | Alias for manufacturer_name in some templates |
reorder_threshold | No | Numeric quantity; triggers low-stock alert when on-hand falls at or below this value |
require_container_barcode | No | TRUE or FALSE; enables the container barcode verification policy |
description | No | Internal notes or handling precautions |
After items import
All imported items are created with zero on-hand quantity. Proceed to receive lots for each item to add inventory.
Lots import (bulk lot receiving)
Use this import to receive multiple lots at once — for example, when a large monthly order arrives with 20 or more different materials, or when migrating existing inventory data into a newly set up Clarix organization.
Step-by-step: importing lots
- In the sidebar, click Inventory.
- Click Import in the page header.
- Click the Lots tab.
- Click Download template to download the lots CSV template.
- Fill in the template columns (see below).
- Click Upload CSV and select your file.
- Clarix parses the file and displays a row-by-row preview:
- Green rows — valid, ready to import
- Yellow rows — warnings (e.g., item not found — will be created; duplicate lot number — will be handled per your policy)
- Red rows — errors that must be resolved before import
- Review each row; use the Details column to read the specific error or warning message.
- Fix errors in your CSV file and re-upload, or uncheck invalid rows to skip them.
- Click Confirm import to create the lot records.
All imported lots are created in Quarantined status, exactly as if they had been received through the receive lot form. A QA officer must release each lot before it is available for production.
Lots CSV template columns
| Column | Required | Description |
|---|---|---|
item_name | Yes | Must exactly match an existing inventory item name |
lot_number | Yes | Manufacturer lot number |
quantity | Yes | Quantity received (numeric) |
unit | Yes | Unit of measure — must match or be convertible to the item's default unit |
expiry_date | Yes | Date in YYYY-MM-DD format (e.g., 2027-06-30) |
received_date | No | Date received; defaults to today if omitted |
coa_assay_pct | No | COA assay value as a percentage (e.g., 97.2); values between 50 and 110 are accepted |
container_barcode | No | Barcode value for the physical container |
po_number | Conditional | Required if PO matching policy is enabled |
vendor_name | No | Must match an existing vendor name if provided |
notes | No | Free text receiving notes |
Creating items during lot import
If a row references an item_name that does not yet exist in Clarix, the import can optionally create the item automatically. This behavior is configured by the toggle Create missing items on the import preview screen.
When Create missing items is enabled:
- Rows where
item_namematches no existing item will create a new item with default settings (category: Other, unit from the lot row, no barcode policy). - The new items are highlighted in yellow in the preview.
- You should edit newly created items after import to set the correct category, reorder threshold, and other settings.
When Create missing items is disabled (default):
- Rows referencing non-existent items show an error and are skipped.
- Create the items first via the Items import or manually, then re-import the lots.
Column mapping wizard
If your source file does not use Clarix's exact column names, the column mapping wizard lets you match your file's column headers to the expected Clarix fields.
- Upload your CSV file.
- If Clarix detects that column headers do not match the template, the Column mapping screen appears.
- For each Clarix field (left column), use the dropdown (right column) to select which column in your file contains that data.
- Columns you do not map are ignored.
- Click Apply mapping to proceed to the preview.
You can save a mapping configuration for reuse if you regularly import from the same source system with the same column structure.
Validation errors
The import preview flags rows with errors before any data is committed. Clarix will not import any row with a red error — you must either fix the file and re-upload or deselect that row.
| Error | Cause | Fix |
|---|---|---|
| Item not found | item_name does not match any inventory item | Enable "Create missing items" or create the item first |
| Invalid expiry date | Date is in the wrong format or is in the past | Use YYYY-MM-DD format; contact QA if a past expiry must be imported |
| Assay out of range | COA assay is outside 50%–110% | Verify the COA and correct the value |
| Duplicate lot number | A lot with this number already exists per your duplicate policy | Review the lot duplicate policy or adjust the lot number |
| Invalid category | Category value doesn't match allowed values | Use one of the exact category values from the template |
| Missing required field | A required column is blank | Fill in the required value |
| Vendor not found | vendor_name does not match any vendor record | Create the vendor first in Inventory → Vendors |
After import
After a successful import:
- All imported lots appear on the respective item's Lots tab in Quarantined status
- A Received transaction is created for each lot in the item's transaction history
- An import summary is shown on screen listing how many items and lots were created, and any rows that were skipped
QA officers should review and release the imported lots following your standard incoming QC procedure.
Related pages
Labels and Barcodes
How to print lot labels and container barcodes from Clarix inventory, and how the container barcode policy works during batch execution.
Quality Management System
A complete overview of Clarix's Quality Management System — the hub for all quality events, investigations, corrective actions, and FDA readiness in your 503B facility.