
Settings Overview
Overview of the Clarix settings hub — personal settings (appearance, PIN) and organization settings (modules, numbering, rules, policies, integrations) for 503B facilities.
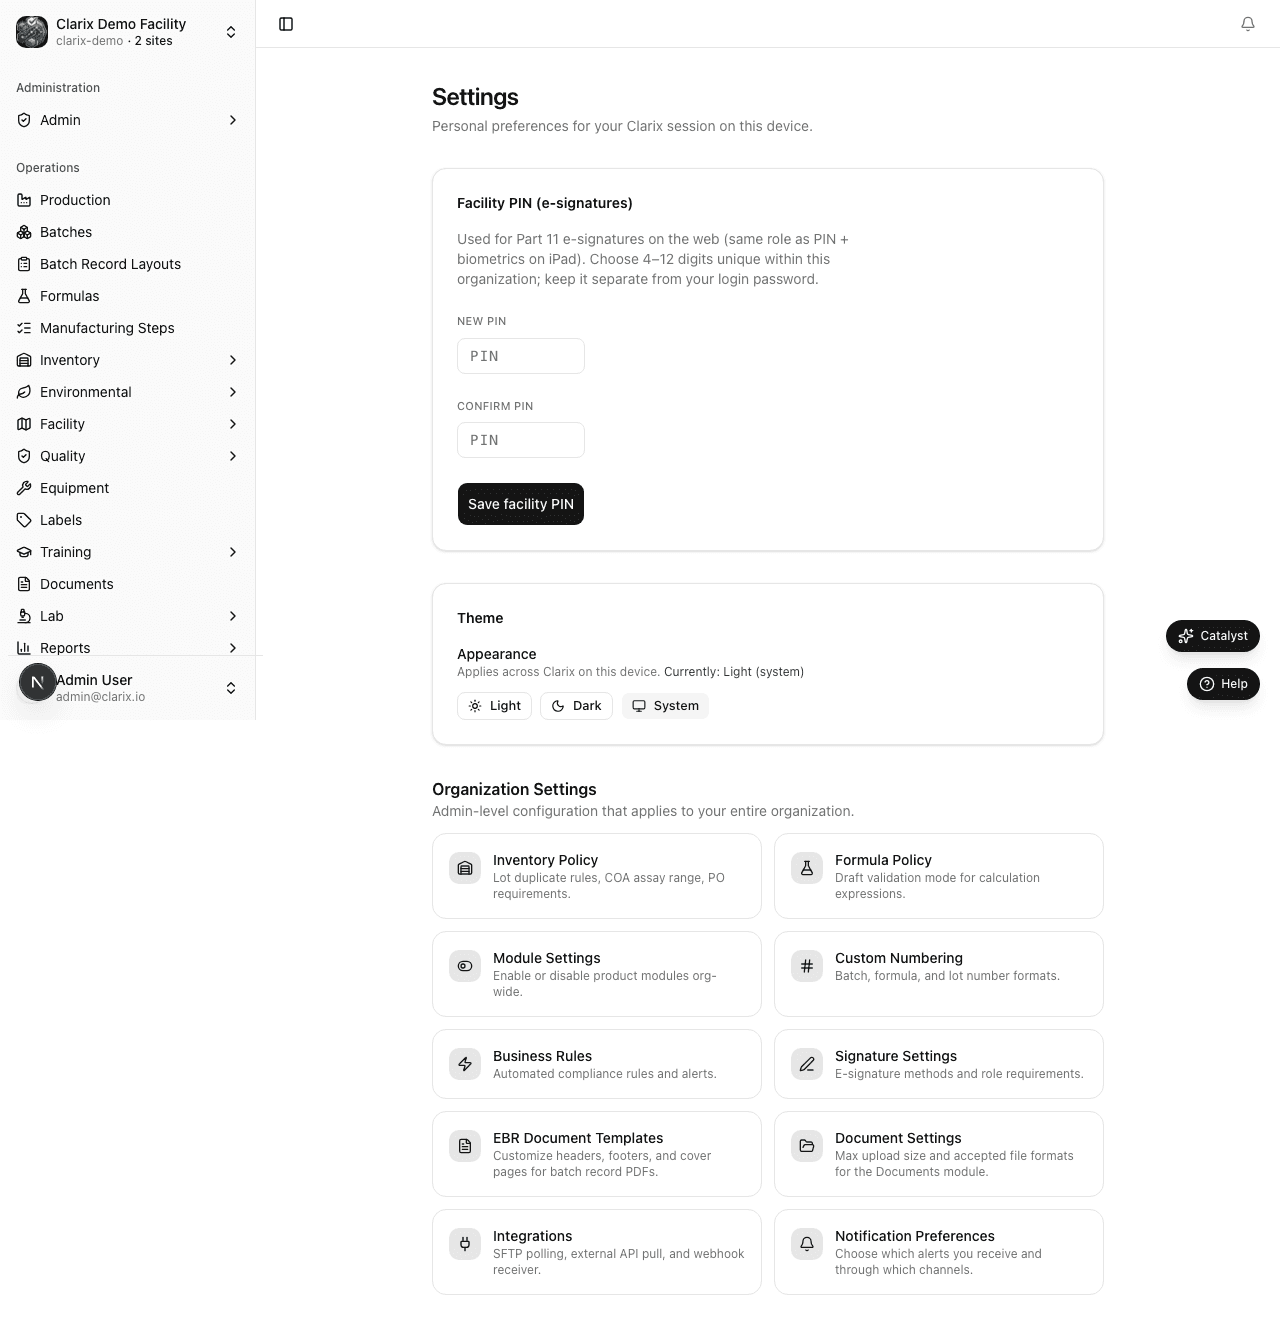
The Settings hub at /settings is the starting point for all configuration in Clarix. Navigate there by clicking Settings in the sidebar. The hub displays a set of cards, each linking to a specific settings area. Some settings apply only to you as an individual user; others are organization-wide and affect all users at your facility.
Role required: Most settings pages are Administrator only. Two settings — Appearance (theme) and Facility PIN — are available to all users regardless of role.
Personal settings
Personal settings affect only your own account and do not change anything for other users at your facility.
Appearance — Switch between light mode, dark mode, and system-default (follows your operating system's display setting). This preference is stored per-user and persists across devices when you are signed in. See Appearance and PIN.
Facility PIN — Set or change your 4-digit PIN, which is used for electronic signatures on the production floor (batch start, QA review, batch release). Your PIN is separate from your login password and is designed for shop-floor use. See Appearance and PIN.
Notification Preferences — Choose which alerts you receive via in-app, email, and push channels. See Notification Preferences.
Organization settings
Organization settings affect all users in your organization. Only administrators can change them. All changes are logged in the audit trail with the administrator's identity and timestamp.
| Settings page | Path | What it controls |
|---|---|---|
| Module Settings | /settings/modules | Enable or disable entire modules (Quality, EM, Lab, Training, Documents, Labels, Facility) |
| Custom Numbering | /settings/numbering | Configure auto-numbering prefixes and formats for each record type |
| E-Signature Gates | /settings/signatures | Set authentication method requirements at each batch lifecycle gate |
| Business Rules | /settings/rules | Configure automated alerts, blocks, and CAPA triggers based on system events |
| Inventory Policy | /settings/inventory-policy | Lot duplicate rules, CoA assay range, PO requirements, default receipt status |
| Formula Policy | /settings/formula-policy | Draft validation mode (Soft vs. Strict) for formula authoring |
| Production Lines | /settings/production-lines | Manufacturing line configuration (name, code, active status) |
| Shifts | /settings/shifts | Shift schedules (name, code, start/end time) |
| EBR Document Templates | /settings/ebr-templates | Visual PDF templates for Electronic Batch Records — custom headers, footers, cover pages, and merge fields |
| Document Settings | /settings/documents | Maximum upload size and accepted file formats for the Documents module |
| Notification Preferences | /settings/notifications | Personal in-app, email, and push notification toggles (all users) |
| Integrations | /settings/integrations | SFTP polling, API pull, webhook import, MasterControl sync |
| MasterControl Integration | /settings/mastercontrol | OAuth credentials and training/quality sync with MasterControl |
Navigating the settings hub
- Click Settings in the left sidebar.
- The hub displays cards for every available settings area. Admin-only settings are visually distinct and will display an access message if your role is insufficient.
- Click any card to open that settings page.
- Make your changes and click the Save button (each settings page has its own save button — changes are not auto-saved).
- A confirmation toast appears when settings are saved successfully. If there is a validation error, an inline message will describe what needs to be corrected.
Settings and the audit trail
Every organization-level settings change is recorded in the audit trail with:
- The setting that was changed
- The previous value
- The new value
- The administrator who made the change
- The timestamp
This provides a complete history of configuration changes, which is important for demonstrating control over your quality system to an FDA investigator. If a setting change may have affected product quality or compliance, that change will be traceable to a specific date and responsible person.
Note: If you are unsure about changing a setting — particularly e-signature gate requirements or business rule configurations — consult your PIC or QA Manager before making the change. Some settings (such as reducing e-signature requirements) have direct regulatory implications and should be made only with documented quality approval.
Related pages
Audit Trail
The complete, append-only system audit log for all create, update, delete, and signature actions across Clarix — required for 21 CFR Part 11 compliance in 503B facilities.
Appearance and Facility PIN
Configure your Clarix display theme (light, dark, or system) and set or change your 4-digit Facility PIN used for electronic signatures on the production floor.